Proxifier is a utility application designed to intercept and redirect the network connections of programs that do not natively support proxy settings. This is its main function: it acts as a network bridge, forcing any designated software, a game client, a legacy application, or a tool without a proxy field to route its outgoing traffic through a SOCKS or HTTPS proxy server you specify.
For many users operating behind restrictive network firewalls (like those found in schools, offices, or highly secure enterprise environments), Proxifier is an essential piece of software.
Why You Need a Tool Like Proxifier
Most modern web browsers and major apps have built-in proxy configuration fields. However, many niche tools, older desktop clients, or games do not. Proxifier solves this problem by enforcing proxy settings at the operating system level, but only for the programs you select.
Key Scenarios where it is indispensable:
- Bypassing Local Restrictions: If your local network administrator blocks connections to a specific remote server (for gaming, streaming, or collaboration), Proxifier can tunnel your application’s connection through an unblocked, remote proxy server.
- Legacy and Non-Standard Software: You might use an older communication tool or a piece of proprietary software where the developer never included a proxy configuration menu. Proxifier is the only solution here.
- Centralized Control: Instead of digging through the settings of dozens of apps, you can manage all your proxy routing rules from one central dashboard.
- Geo-Location Masking for Specific Apps: If you only need one program (like a specific trading client or a foreign game server) to appear to be running from a different country, Proxifier allows you to isolate that traffic without affecting your entire system.
Important Technical Clarity
When discussing proxy routing, it is important to address two common misconceptions that often appear in generic online guides:
1. Proxifier and Internet Speed
Routing traffic through Proxifier and a remote proxy server will almost always introduce a measurable amount of latency (delay). This is because the data must take an extra hop to reach the proxy before continuing to its final destination. Proxifier does not improve your bandwidth or connection speed. If the connection feels faster, it’s usually because the proxy server is geographically closer or has a better, less congested path to the specific game server you are trying to reach.
2. Proxifier and Encryption
Proxifier is a router, not an encryptor, and it should never be mistaken for a Virtual Private Network (VPN). Its primary role is to simply redirect data packets, not to secure or conceal them. The actual security and privacy of your connection depend entirely on the type of proxy you choose to use. When connected through a secure HTTPS or SOCKS5 proxy, your data is encrypted during transmission between your device and the proxy server. However, if you rely on a basic HTTP proxy, your data is usually transmitted in plain text, leaving it vulnerable to interception. Therefore, it’s important to remember that any encryption or protection comes from the proxy itself – not from the Proxifier software.
Complete Guide to Setup and Advanced Use
This section provides a visual, step-by-step walkthrough for installing Proxifier and creating the two core components of any setup: a Proxy Server definition and the Proxification Rules that control which applications use it.
Part I: Download and Installation
Before configuring any rules, you must first obtain and install the software.
Step 1: Download the Installer
- Visit Proxifier’s official website.
- Download the setup file for your operating system. Make sure that you have downloaded the installer specific to your operating system (Windows or macOS).
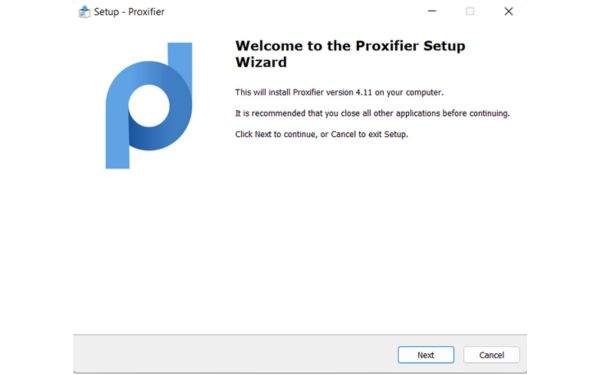
Step 2: Run the Installation
- Locate the downloaded file on your device (e.g.,
ProxifierSetup.exeon Windows orProxifierSetup.dmgon macOS) and run it. - Follow the setup wizard: click Next, accept the license agreement
- Choose an installation directory (the default is recommended, or click Browse to select a custom folder).
- Click Install and wait for the process to complete. Launch Proxifier when finished.
Part II: Configuration
Configuration is a two-step process: first, you tell Proxifier where to send traffic (the proxy server), and then you create a rule to apply that server to a specific program.
1. Adding the Proxy Server
This defines the physical connection parameters for your proxy.
- Open Proxifier and navigate to Profile > Proxy Servers.
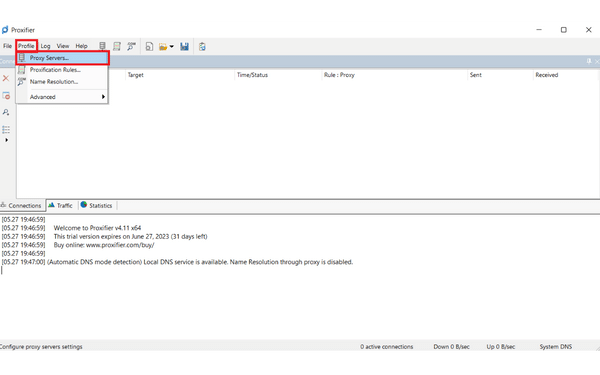
- After clicking on Proxy Servers, a new pop-up window will appear. In the top-right corner of this window, click the Add button to create a new proxy entry.
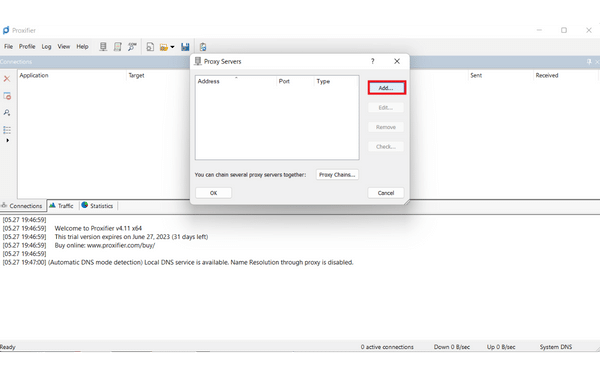
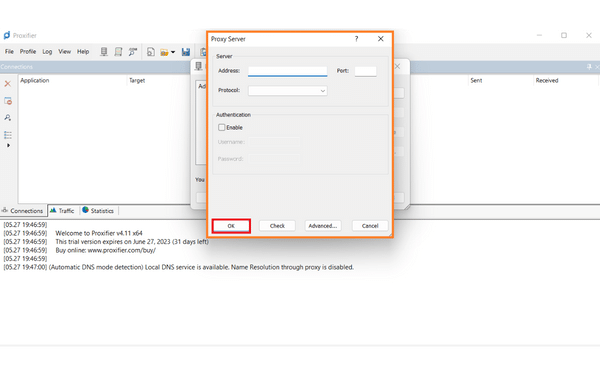
- A new dialog named “Proxy Server” will open. Here, enter the connection details provided by your proxy service:
- Address: The proxy server’s IP or hostname.
- Port: The port number (e.g., 1080 for SOCKS, 443 or 8080 for HTTP/HTTPS).
- Protocol: Use the radio buttons to select the appropriate protocol. SOCKS Version 5 (recommended as it handles all types of traffic and DNS resolution better than HTTP proxies) or HTTPS.
- Authentication: If your proxy requires a username and password, check the box labeled “Enable” under the “Authentication” section and enter your credentials.
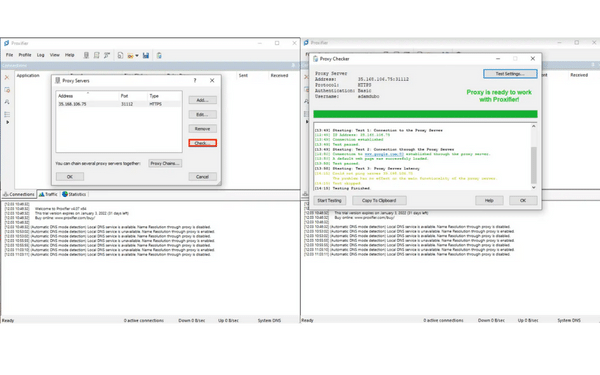
- Test the Connection: Go to Profile → Proxy Servers → Check. A “Success” message confirms everything is working.
💡 Troubleshooting Connection Errors
If you encounter an error, review your configuration carefully – especially the IP address, port number, and protocol version.
If the issue continues, try changing the Port or switching between SOCKS Version 4 and SOCKS Version 5 to see which one works best with your network.
2. Creating Proxification Rules
The earlier (above) steps explained how to route all your internet traffic through Proxifier. However, sometimes you may want to use the proxy for only one specific app or domain. In such cases, you can create Proxification Rules to control which applications or services use the proxy. Here’s how to do it:
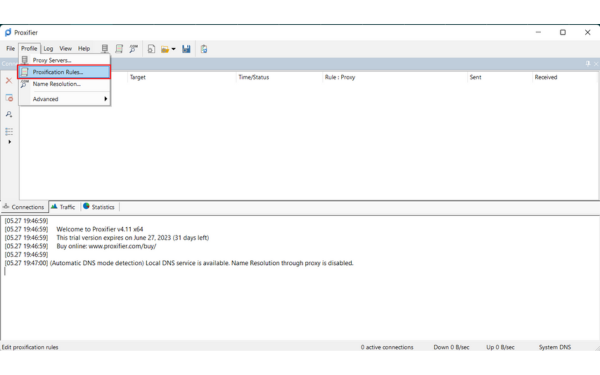
- Open the Proxifier app on your system. From the main menu bar, navigate to Profile > Proxification Rules.
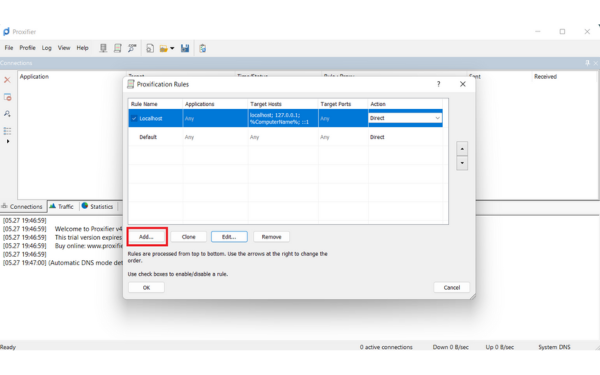
- You will see default rules. The Localhost rule should always be set to Direct. The Default rule acts as a catch-all for any traffic not matched by other rules.
- To route a specific application, click Add.
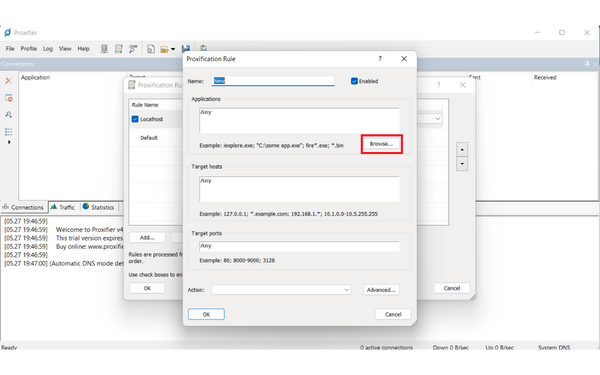
- In the new rule window:
- Name: Give it a descriptive name (e.g., “BlueStacks Traffic”).
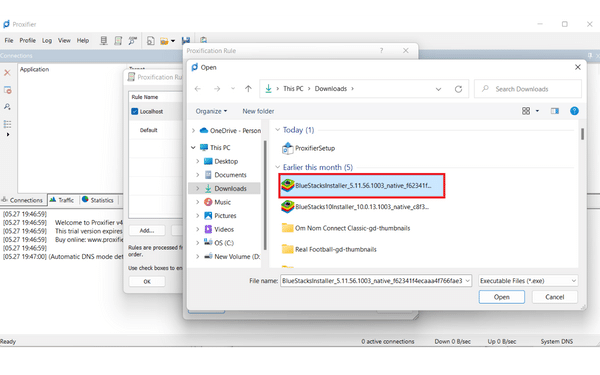
- Applications: Click Browse… and select the application’s executable file (e.g.,
BlueStacks.exe).
- In my case, I selected the BluStacks App.
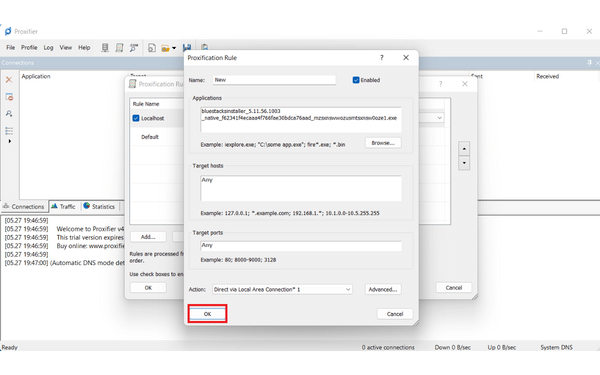
- Critical Step: In the Action dropdown, select the proxy server you configured earlier (it will appear by the IP/port you entered). This tells Proxifier to route this specific application’s traffic through your proxy.
- Final Configuration: Ensure your Default rule is set to Direct. This prevents your web browser and other traffic from being accidentally routed through the proxy unless you explicitly create a rule for them.
Availability and Alternatives (January 2026)
Proxifier is a stable, commercial product available with a generous 31-day trial period.
- Official Platforms: Windows and macOS. There is no stable, officially supported version for Linux, Android, or iOS.
- Cost: The standard license price remains competitive, typically around $39.95 USD (always verify the current price on the official website before purchasing).
Technical Alternatives
If Proxifier isn’t suitable, consider these alternatives, which fulfill similar, specialized needs:
- ProxyCap: This is Proxifier’s most direct, functional competitor, offering similar rule-based routing for applications.
- SOCKS Tunnels (PuTTY/OpenSSH): For technical users who need a free solution, a Dynamic SOCKS Proxy can be manually created using SSH clients like PuTTY or a simple command line, to which applications can then be pointed.
- VPN Clients: If your goal is to secure and route all traffic on your device, a commercial VPN (like Mullvad or ExpressVPN) is the simpler, dedicated solution for full system encryption and IP masking.